

Table of Contents
ToggleMontessori tools form the foundation of a learning approach that puts children in control of their education. These carefully designed materials help kids develop skills through hands-on exploration rather than passive instruction. Dr. Maria Montessori created this method over a century ago, and it remains one of the most respected educational philosophies worldwide.
Parents and educators often wonder what makes Montessori tools different from regular toys or classroom supplies. The answer lies in their purpose. Each material serves a specific developmental goal while allowing children to learn at their own pace. This article covers the key categories of Montessori materials, how to select the right ones, and practical tips for creating a Montessori-friendly space at home.
Key Takeaways
- Montessori tools are educational materials made from natural elements like wood and metal, designed to isolate one concept at a time with built-in error correction.
- The five core categories of Montessori materials include practical life, sensorial, language, mathematics, and cultural studies—each targeting specific developmental needs.
- Practical life tools such as pouring sets and dressing frames build fine motor skills and independence in everyday tasks.
- When choosing Montessori tools, observe your child’s interests first and match materials to their developmental stage rather than buying everything at once.
- Create a Montessori-friendly home environment using low, open shelving with only 4–6 activities displayed at a time to encourage focus and independence.
- Many effective Montessori tools can be made at home using household items like pitchers, dried beans, and sorting trays.
What Are Montessori Tools?
Montessori tools are educational materials designed to support self-directed learning. They differ from typical toys because each one targets a specific skill or concept. A child uses these tools independently, discovers patterns, and corrects their own mistakes without adult intervention.
The design of Montessori tools follows several key principles. First, they isolate one concept at a time. A set of cylinder blocks, for example, focuses only on size discrimination. Second, they include built-in error control. If a piece doesn’t fit, the child sees the mistake immediately. Third, they use real materials like wood, glass, and metal rather than plastic. This gives children authentic sensory experiences.
Montessori tools also progress from simple to complex. A toddler might start with a basic puzzle, then move to more challenging versions as their skills develop. This progression keeps children engaged without overwhelming them.
Another important feature is their aesthetic quality. Montessori materials look beautiful and inviting. They sit on open shelves at child height, encouraging kids to choose activities independently. This setup respects children’s natural curiosity and promotes decision-making from an early age.
Core Categories of Montessori Materials
Montessori tools fall into five main categories: practical life, sensorial, language, mathematics, and cultural studies. Each category addresses different developmental needs. For this guide, we’ll focus on two foundational categories that form the basis for all other learning.
Practical Life Tools
Practical life tools help children master everyday activities. They include items like child-sized brooms, pitchers for pouring, and frames for practicing buttons and zippers. These Montessori tools build independence and fine motor skills.
Pouring exercises use small pitchers and bowls. Children practice transferring water or dry goods like rice. This simple activity develops hand-eye coordination and concentration. It also prepares hands for writing.
Dressing frames teach children to manage closures on their clothing. Frames come with various fasteners: large buttons, small buttons, snaps, zippers, and bows. Kids practice on the frame before applying skills to their own clothes.
Food preparation tools include child-safe knives, cutting boards, and peelers. Children slice bananas, spread butter, or peel carrots. These activities build confidence and practical skills they’ll use throughout life.
Sensorial Materials
Sensorial Montessori tools refine the five senses. They help children organize and classify sensory information from their environment.
The pink tower consists of ten wooden cubes in graduated sizes. Children stack them from largest to smallest. This activity develops visual discrimination of size and prepares the brain for mathematical concepts.
Color tablets come in boxes with increasing difficulty. The first box contains three pairs of primary colors. Advanced boxes include 63 color gradations. Children match colors and arrange them by shade.
Sound cylinders contain pairs of wooden tubes with different materials inside. Children shake them and match pairs by sound. This sharpens auditory discrimination.
The geometric cabinet holds trays of wooden shapes. Children trace each shape, feeling the difference between a circle, square, triangle, and more. This hands-on exploration lays groundwork for geometry.
How to Choose the Right Montessori Tools
Selecting Montessori tools requires attention to quality, age-appropriateness, and the child’s current interests. Here are practical guidelines for making good choices.
Material quality matters. Authentic Montessori tools use natural materials like wood, metal, and fabric. These materials provide sensory feedback that plastic cannot match. They also last longer and often hold up across multiple children.
Match tools to developmental stages. A two-year-old needs simpler Montessori tools than a five-year-old. Start with practical life materials for toddlers. Add sensorial materials as children approach age three. Language and math materials typically suit children ages four and up.
Observe the child first. Before buying anything, watch what interests your child. A kid fascinated by cooking will thrive with food preparation tools. One who loves sorting might connect better with sensorial materials. Let observations guide purchases.
Start small. You don’t need a fully equipped classroom. Begin with three to five Montessori tools and rotate them regularly. This prevents overwhelm and keeps materials fresh and engaging.
Consider DIY options. Many Montessori tools can be made at home. A simple pouring activity requires only two small pitchers and some dried beans. Sorting trays use household items like buttons, shells, or pasta shapes. Homemade options work well alongside purchased materials.
Setting Up a Montessori Environment at Home
Creating a Montessori-friendly space at home doesn’t require a complete renovation. A few adjustments make a big difference.
Use low, open shelving. Place Montessori tools on shelves where children can see and reach them independently. Avoid toy boxes where everything piles together. Each material should have its own spot on the shelf.
Limit choices. Display only four to six activities at a time. Too many options overwhelm children and reduce focus. Rotate materials every week or two based on your child’s interests.
Create defined work areas. Small rugs or trays define workspaces. Children take a material to their rug, complete the activity, and return it to the shelf. This process teaches organization and respect for materials.
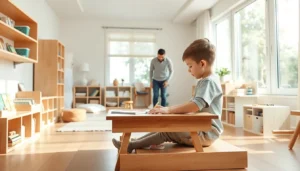
Make the space child-sized. Provide a small table and chair where children can work comfortably. Hang hooks at child height for coats and bags. Place a step stool near the sink for hand washing.
Maintain order. A tidy environment supports concentration. Montessori tools should always return to their designated spots. This consistency helps children feel secure and develop organizational habits.
The goal is creating a space where children can move freely, choose activities, and work without constant adult direction. Even a small corner of a room can function as an effective Montessori area.